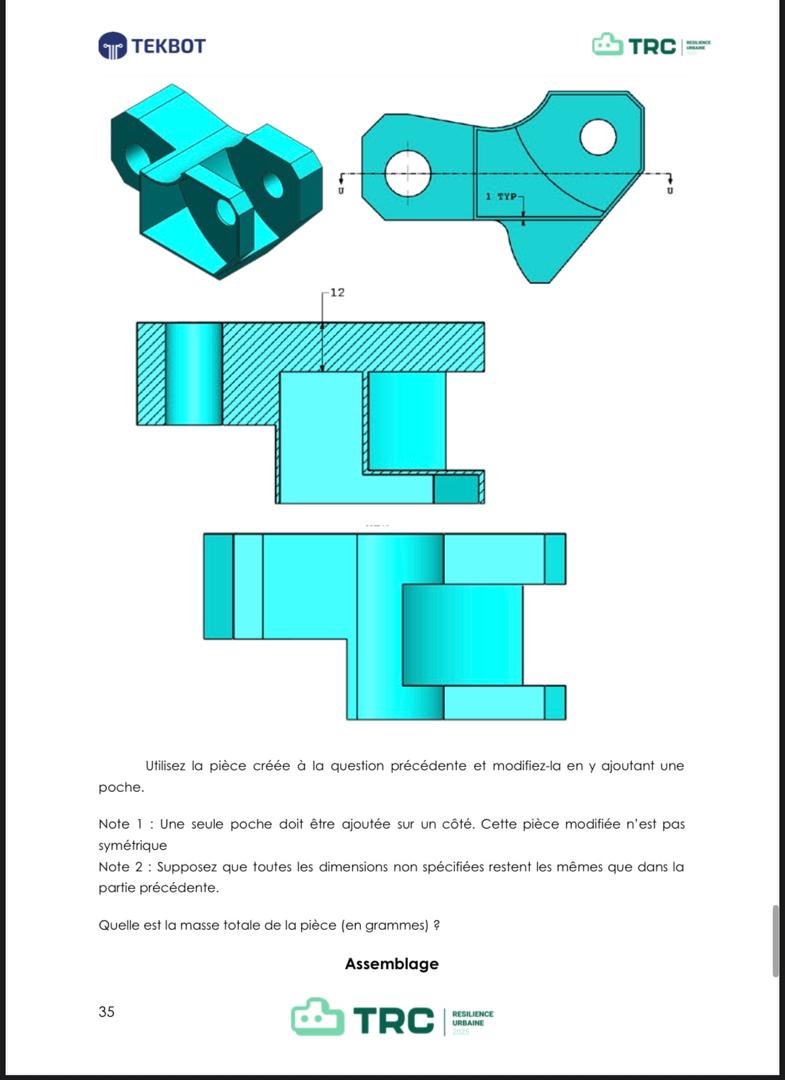
REALISATION DE LA PARTIE III!
Image presenting the task to be carried out
Tools used and role
The goal of this task is to create a pocket (hollow) on the part of part II. To achieve this task, you will need to use a number of tools, namely: -"Extruded Cut" allows for removing material from a 3D solid to achieve a certain result. -The "Shell" tool is used to hollow out a solid part to make it hollow with walls of constant thickness. It allows material to be removed from the inside of a solid while maintaining its external shape. -"Convert entities" is used to project or copy edges, faces, or sketch contours onto the current sketch plane. It saves time by allowing you to reuse existing geometry instead of redrawing it.
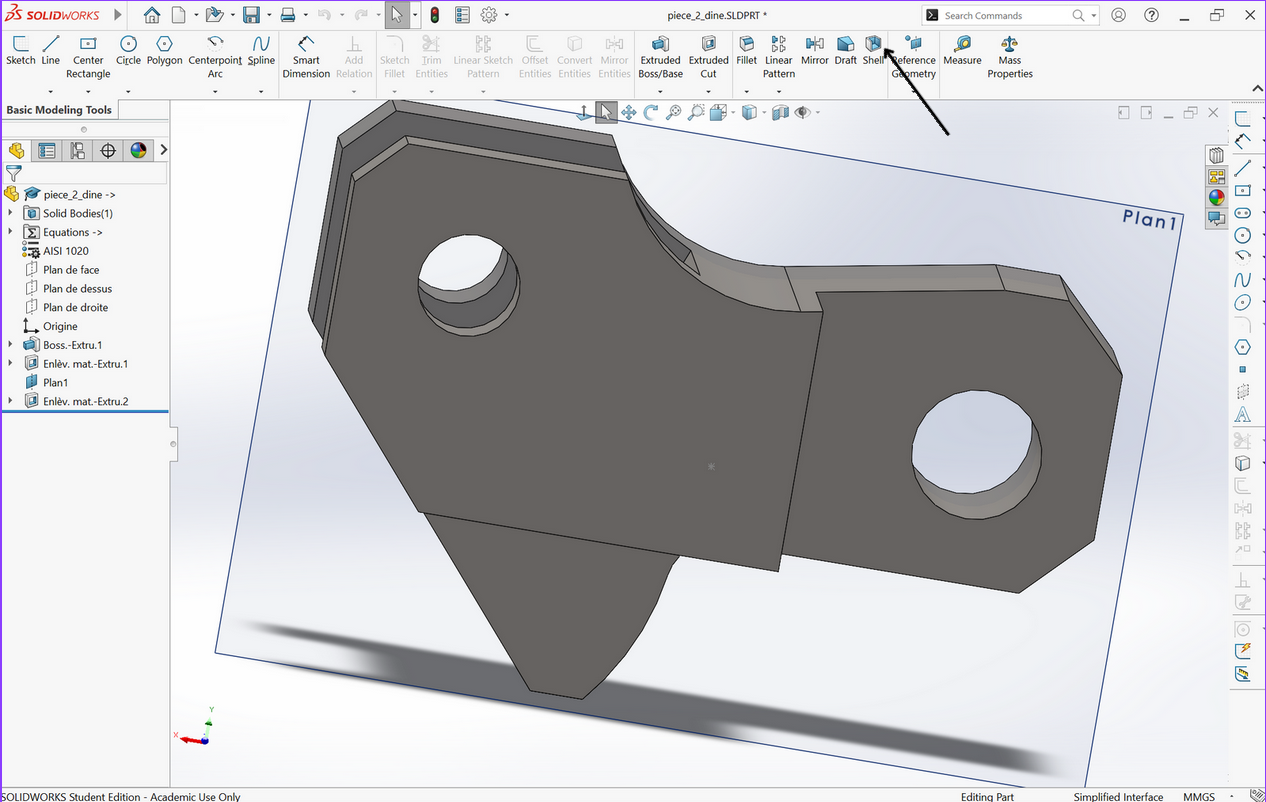
How to start creation of the part?
Short Demo
Link to Download: Link to download
Implementation Steps
To complete this task, the first thing to do is to download the part provided after completing part II. After downloading this piece you will need to click on it to open it.
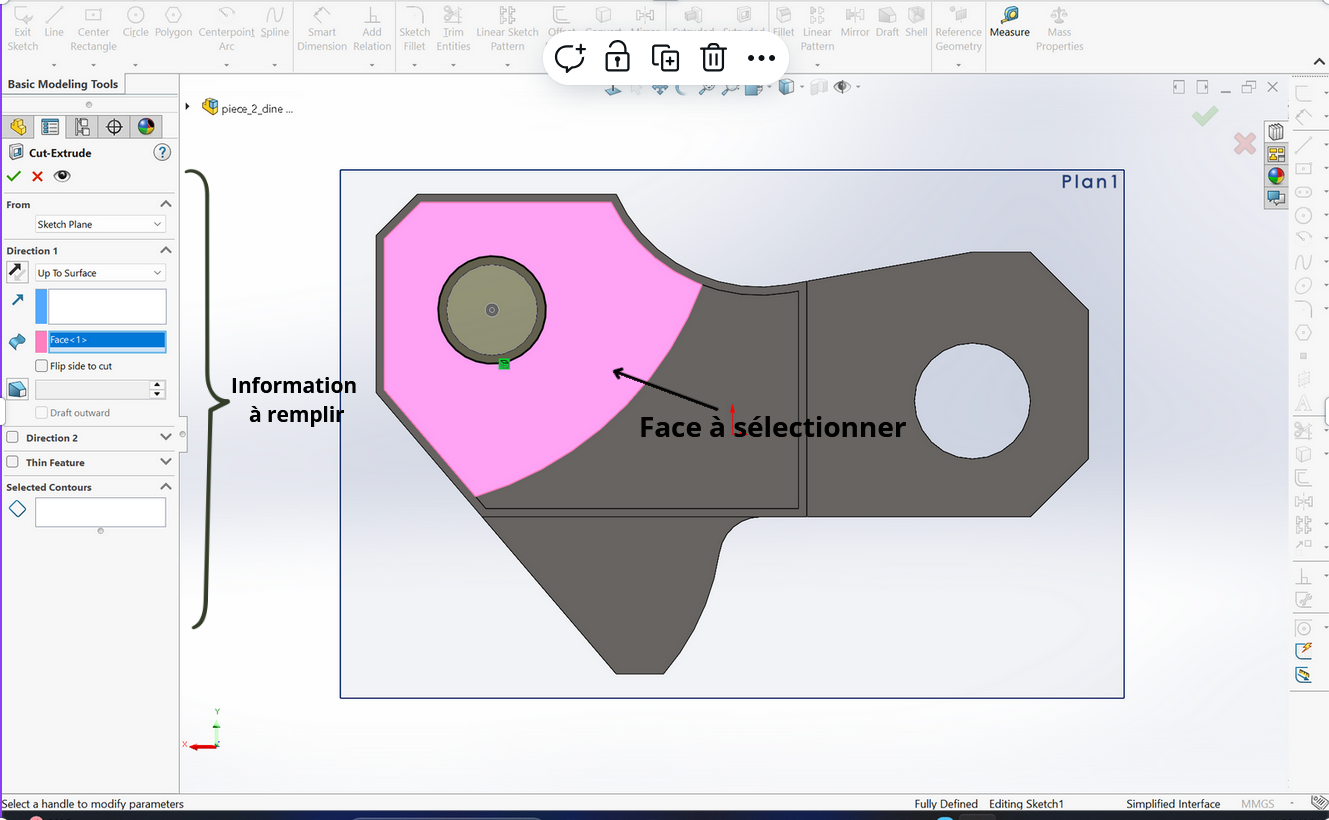
How to make the hollow on the face indicated in the image below?
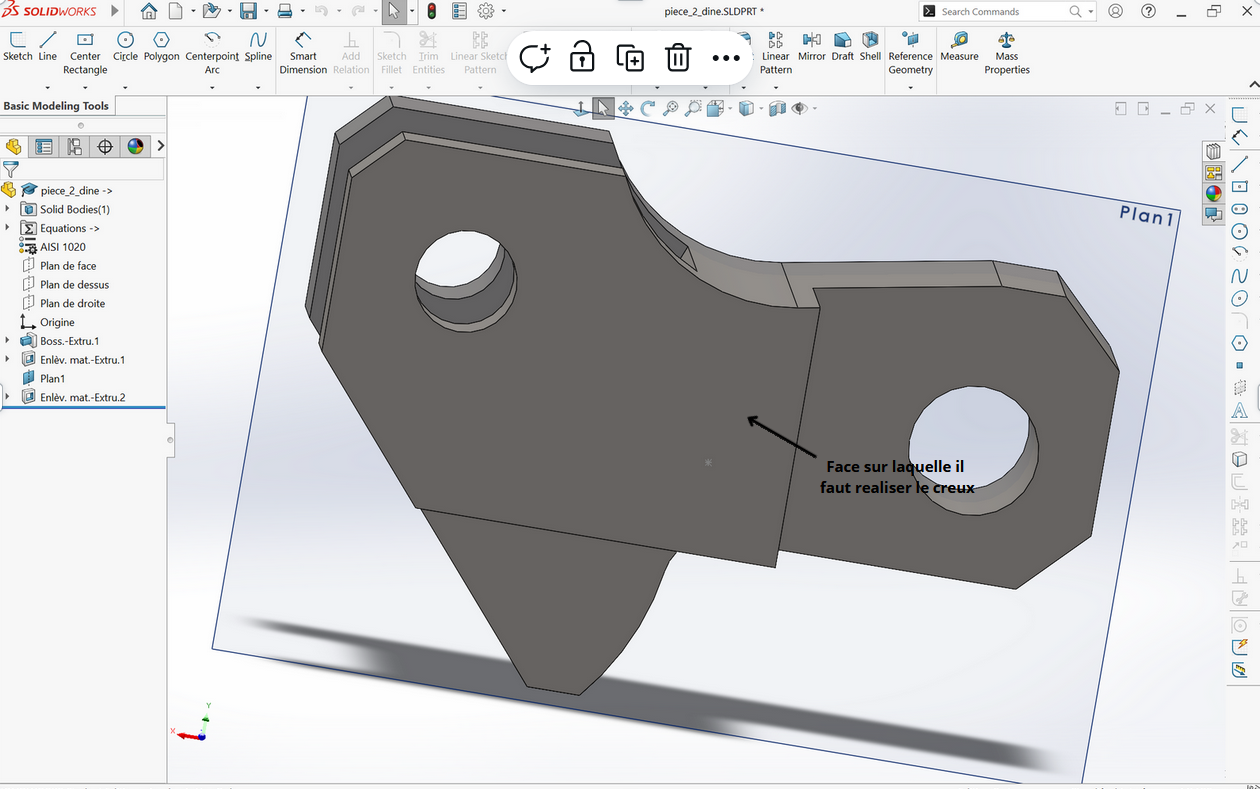
To make this hollow you have to follow a certain number of very precise steps, namely: -Click on the shell (the role of the shell is specified at the beginning of the file) in order to make a hollow on the surface -Fill in the information as shown in the second photo of this step -Confirm the creation of the hollow by clicking on the green check mark
How to remove the cylindrical part on the face?
The purpose of this step is to remove the cylindrical part located on the face in order to carry out the requested task. The part to be removed is indicated in the image below
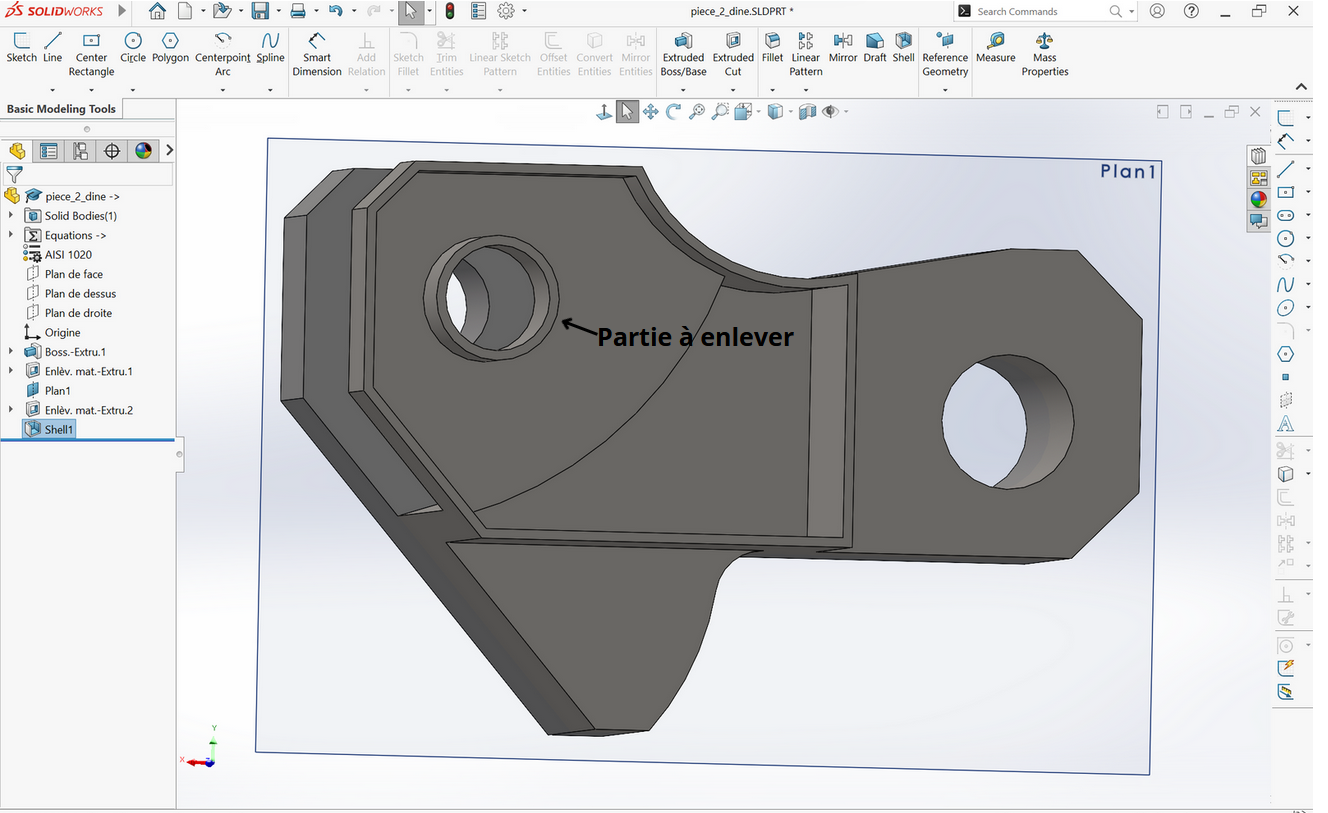
The first thing to do to accomplish this task will be to click on the face and then convert this face into an entity using "Convert Entities" which is used to project or copy existing contours of a part or a sketch onto a new plane.
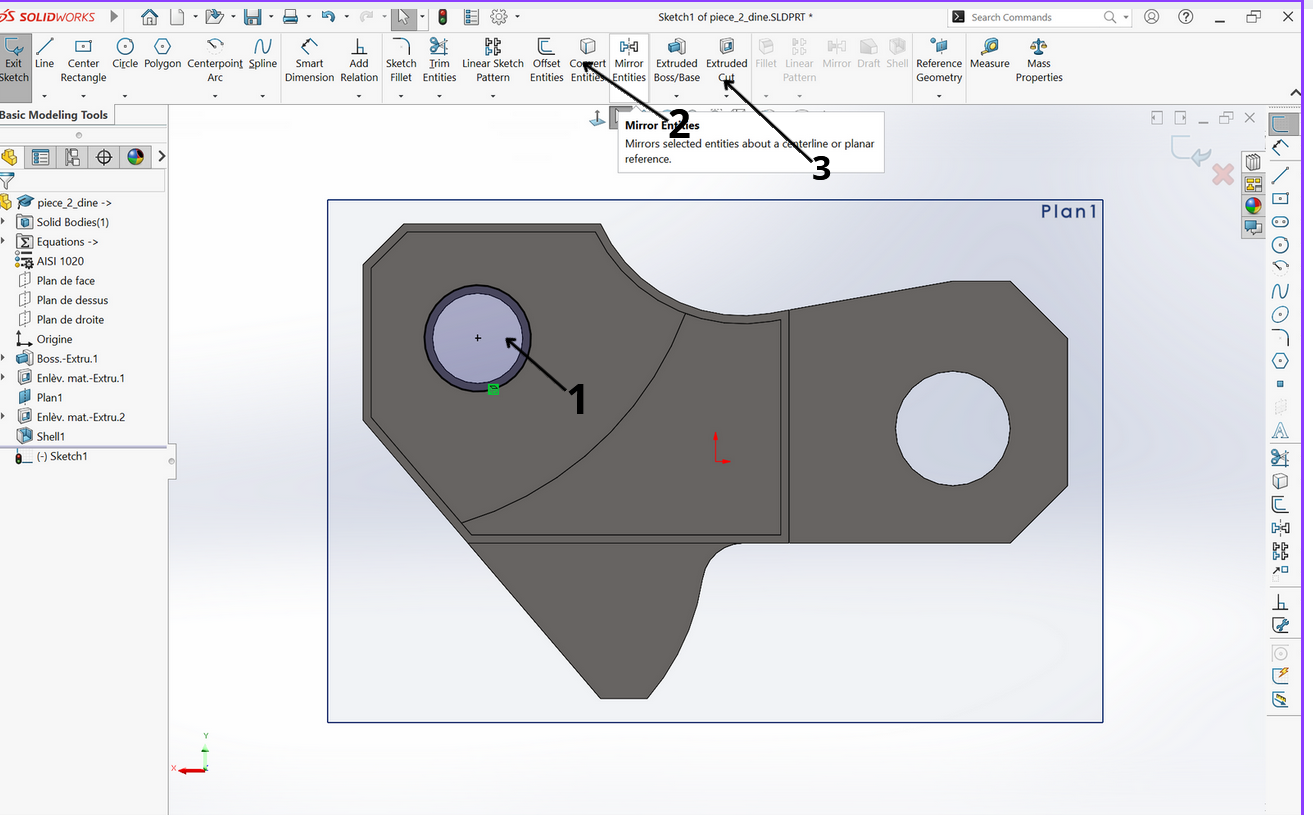
After this step you will need to click on "Extruded cut" to remove the part and then fill in the information and select the face on which the cylinder is located as shown in the image below
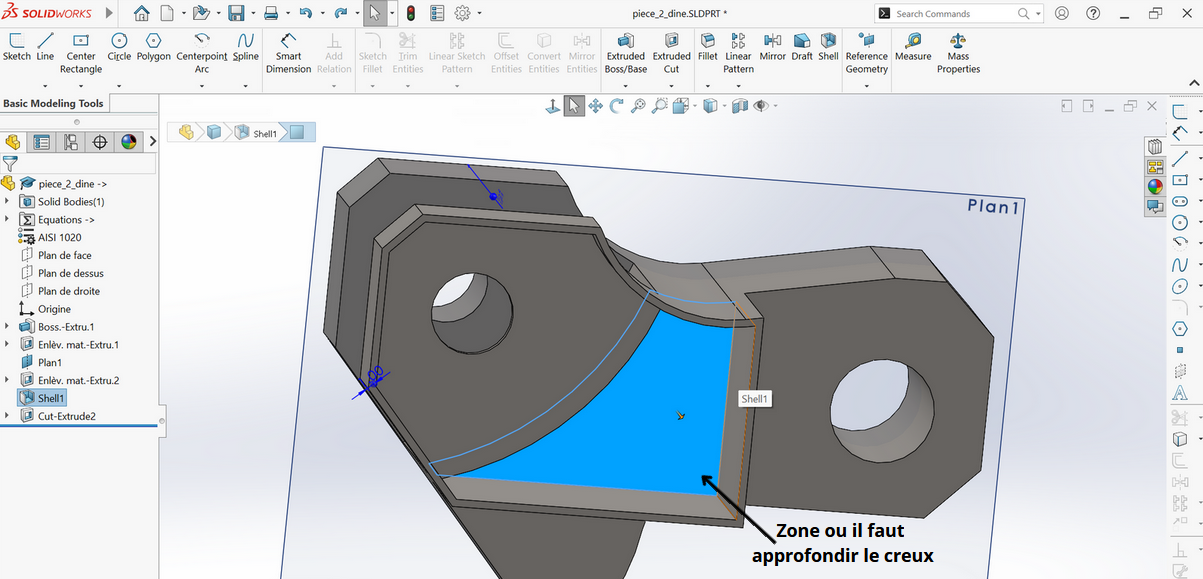
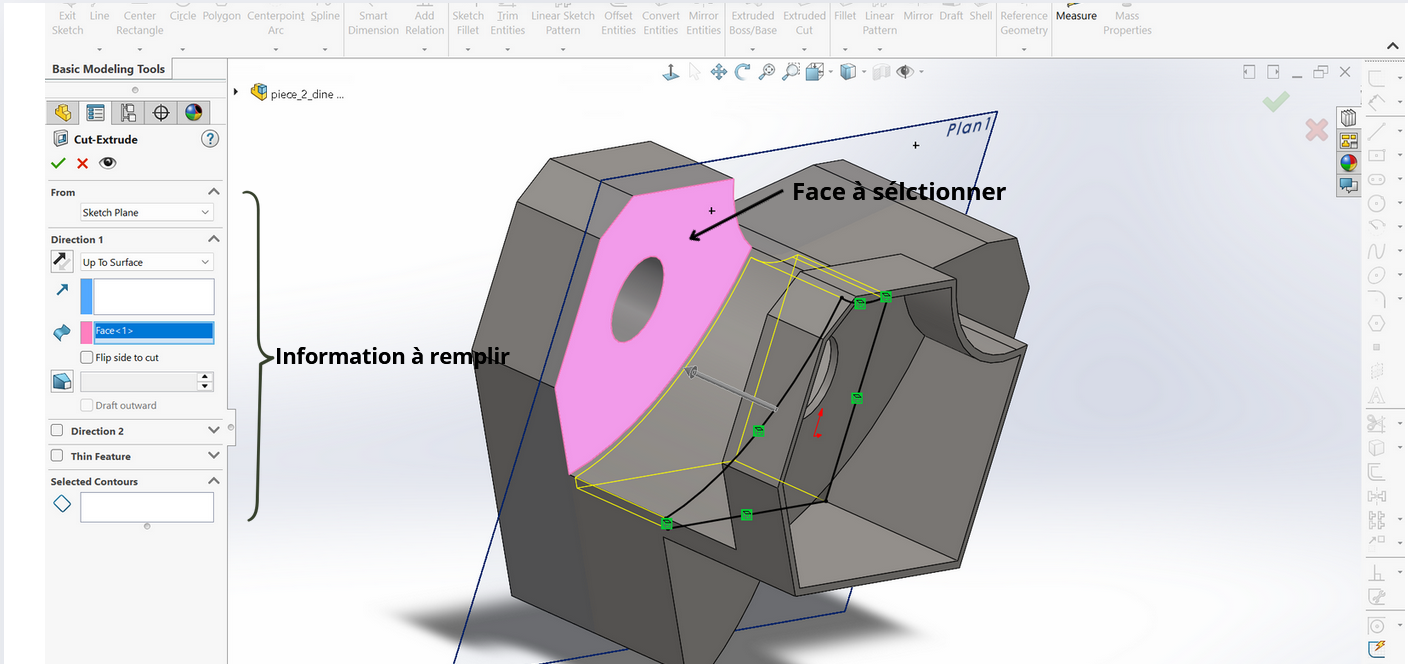
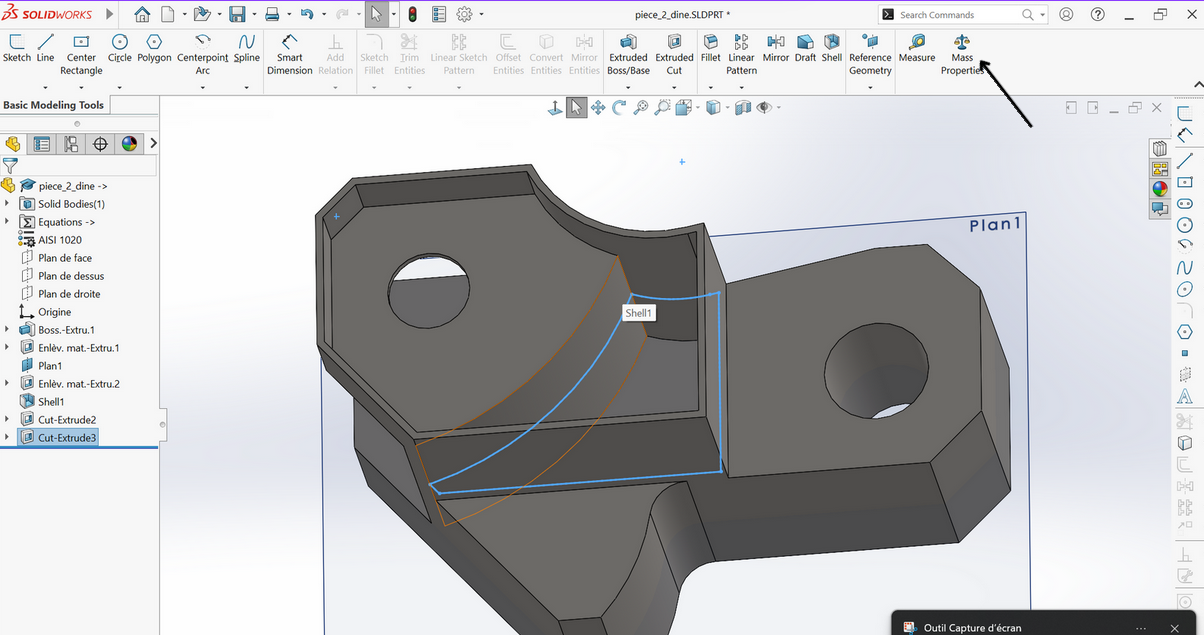
How to deepen the hollow?
The face on which the hollow must be made is indicated in the image below
How to know the mass of the part?
To know the mass you have to click on mass properties as shown in the image below. When you click on mass properties a list will appear and on this list there will be the mass indicated
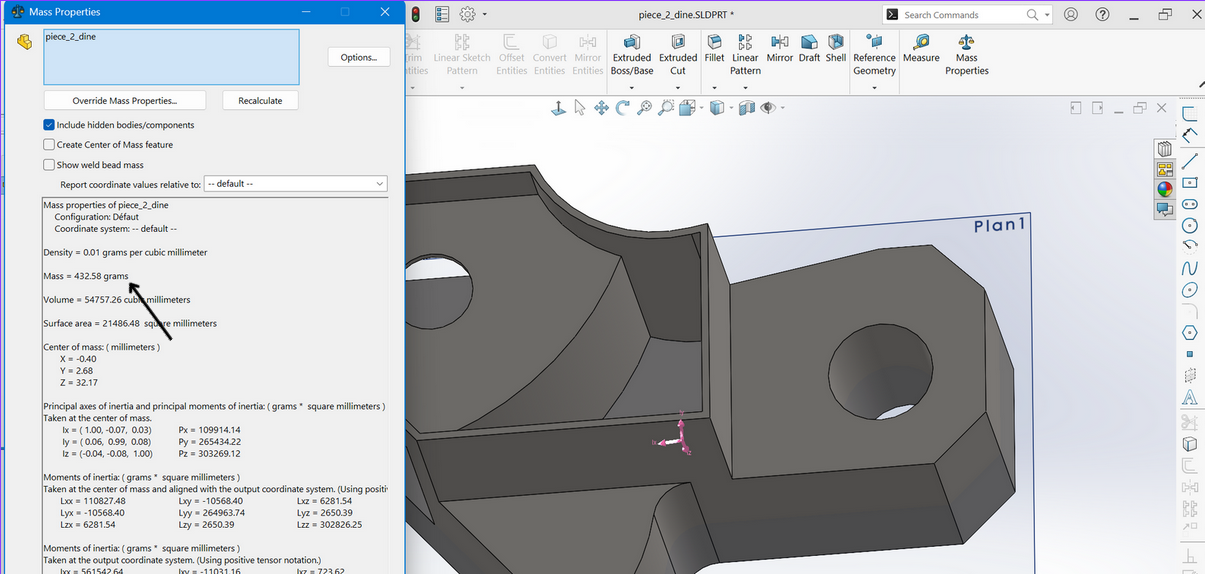
The mass of this part is: 432.58g
Presentation of the final piece
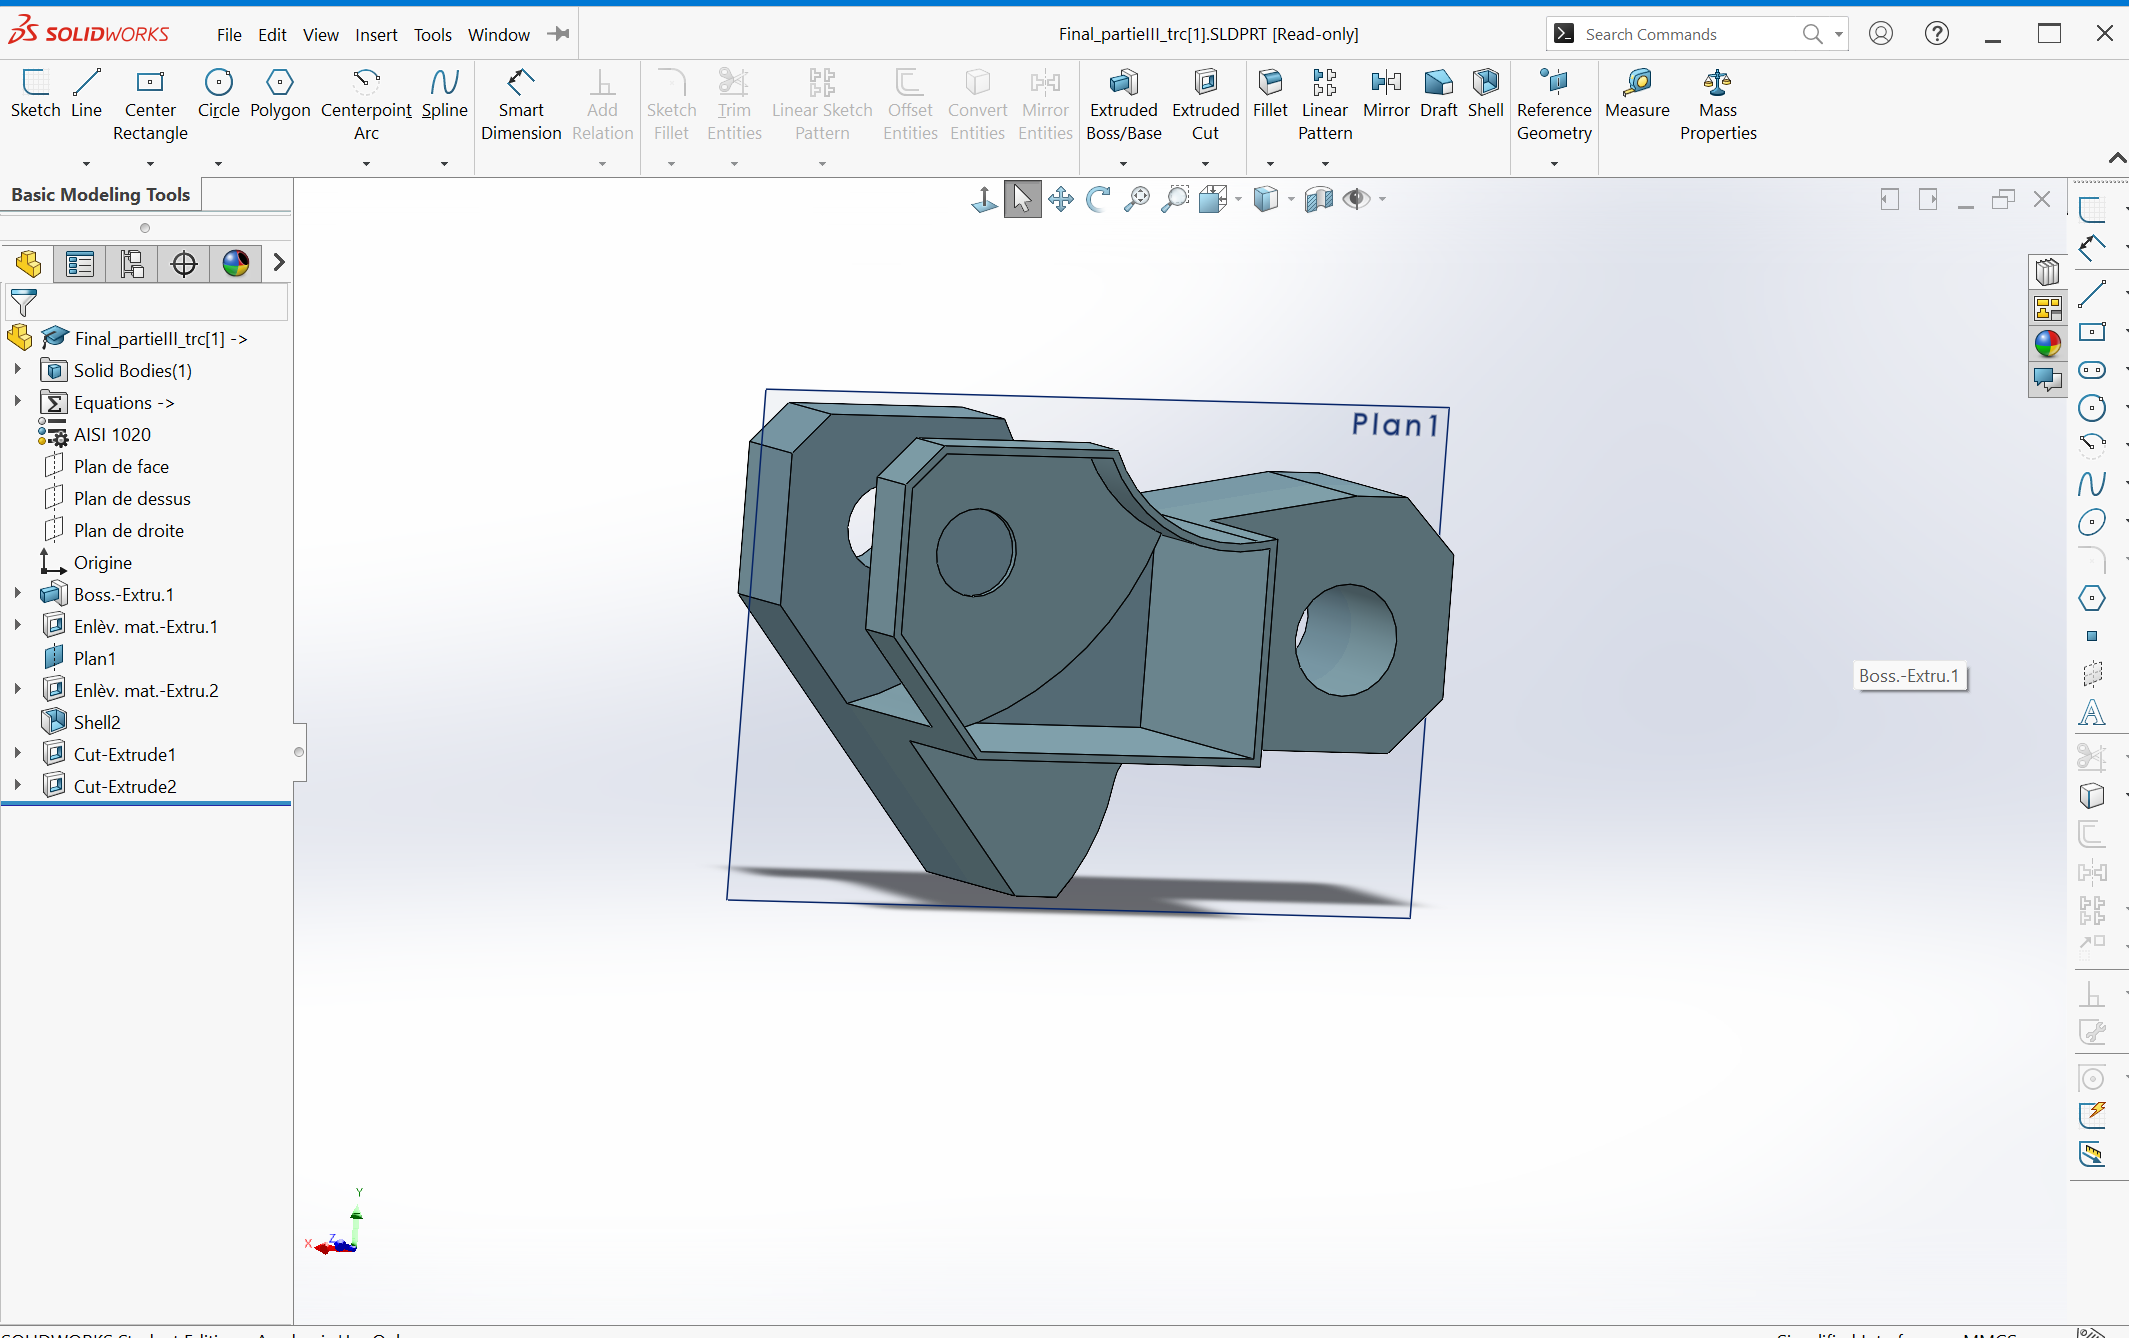
NOTE: the color is not an obligation